Embedded Lead-Gen Form
Approve Owl have several ways to get an applicant into our data collection flow.
- SMS Invites from the business portal
- A publicly accessible consumer portal
- A robust API for integration with third-party systems
- A light-weight embeddable sign up form delivered via an HTML
iframe
Quick Start
Put the following snippet on your website where you want the Sign Up Form to appear. Note that vandelayautos.approvehub.com is a demo account. You will use your own consumer portal domain.
<div id="approveOwl">
<a href="https://vandelayautos.approvehub.com">Get Approved Here</a>
</div>
<script src="https://dealers.approveowl.com/embed.js"></script>
<script>
loadApproveOwl({
consumerPortal: "vandelayautos.approvehub.com",
onSubmission: function (applicantId) {
console.log(applicantId);
},
});
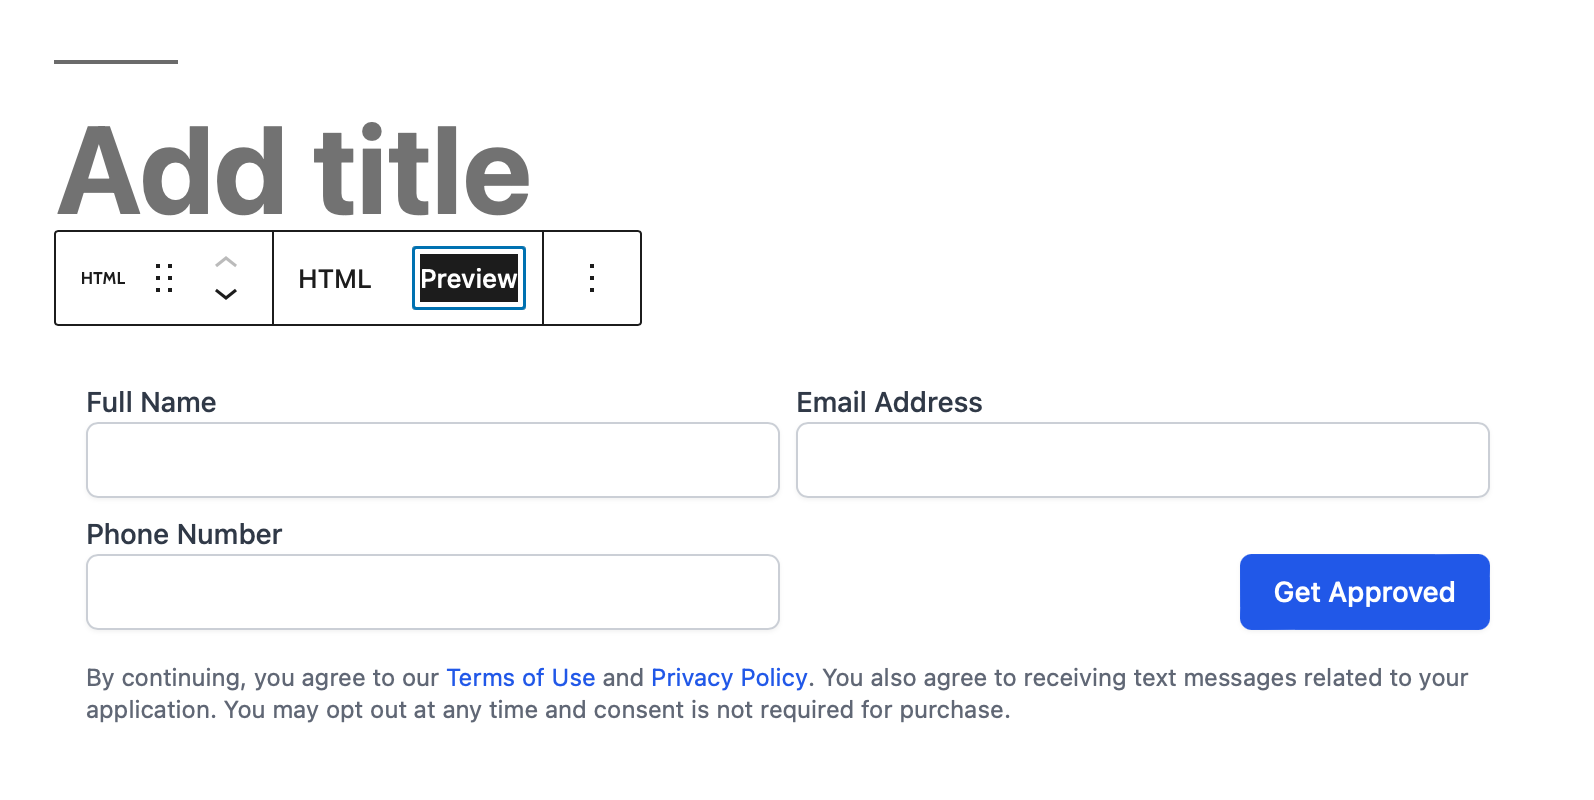
</script>The Sign Up Form
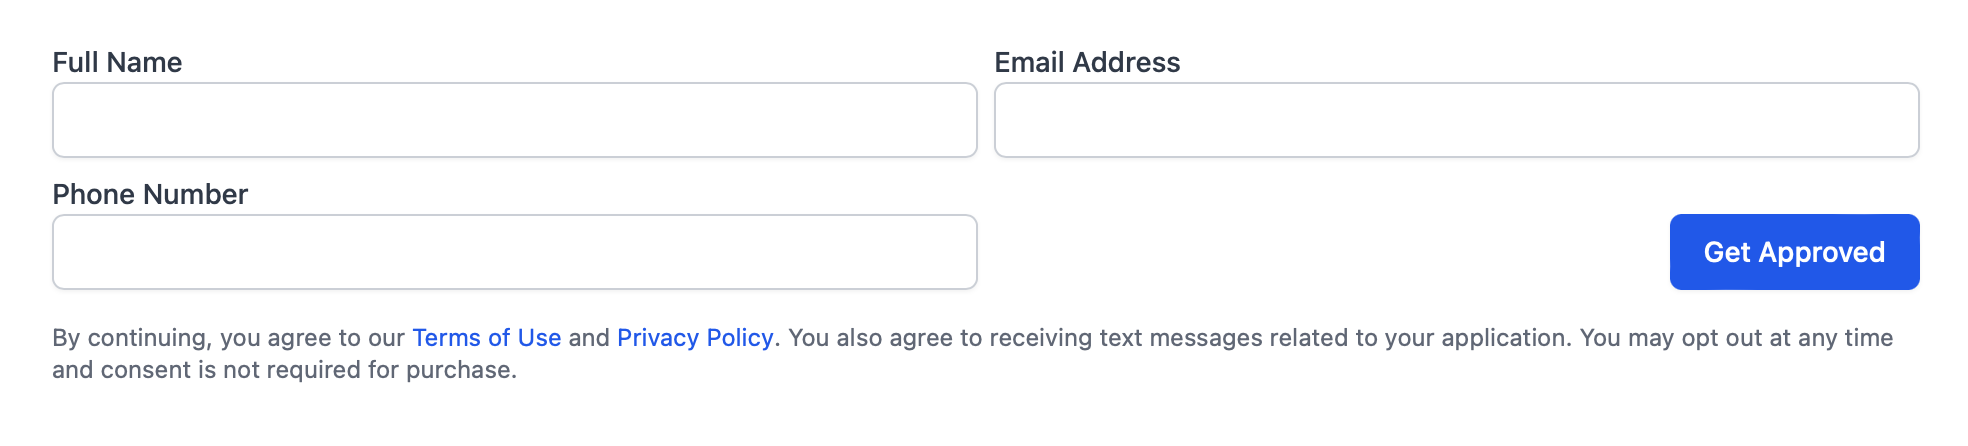
Our emeddable sign up form is responsive for desktop, tablet and mobile devices and conforms to the size of the container it is loaded into and the height of the iframe will automatically resize based on initial content we send to your web page.
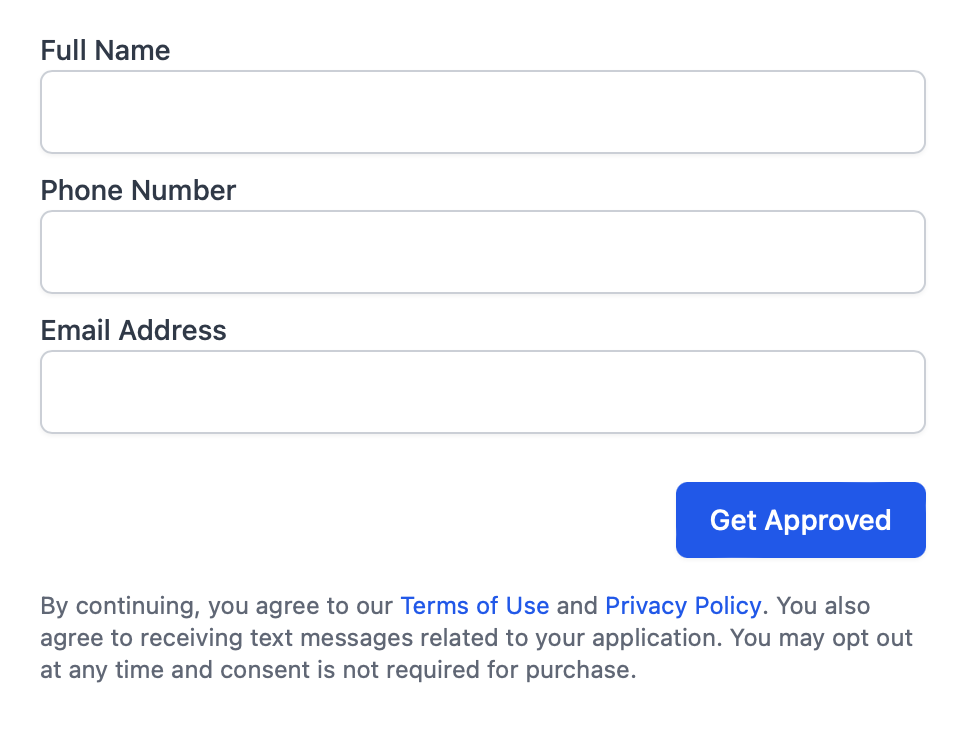
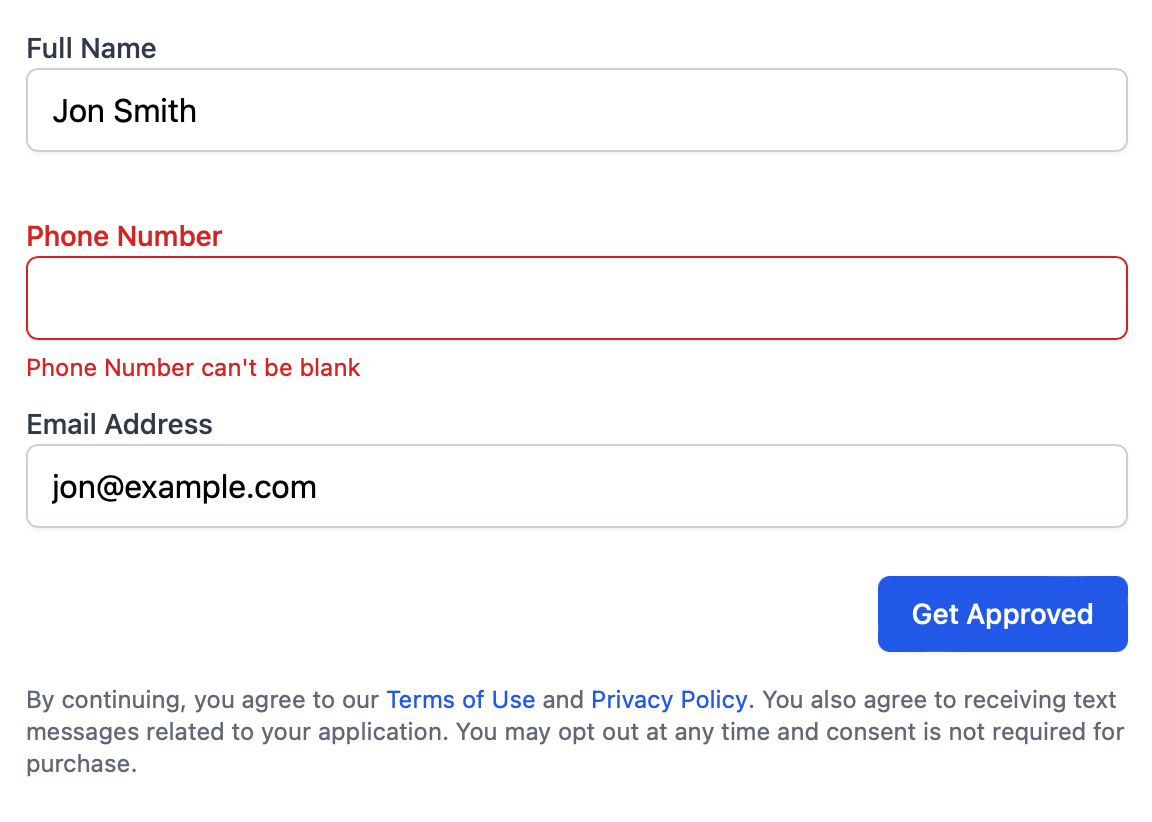
The form includes three fields (Full Name, Email Address, and Phone Number). Currently, all three fields are required by the applicant. We also feature inline errors so applicants are aware of the missing information.
Currently, we only have a light color theme form, so if you have a dark theme for your website, you may want to style the containing div to with maybe rounded corners or some additional padding to make sure the form looks more integrated with your layout and theme. We also don't ship any marketing text above or below form as that will be unique to your organization and your audience.
We do include a small amount of text alerting the applicant that submitting means they agree to our TOS, privacy policy and SMS updates.
Embed Snippet
For our basic embed snippet, you need to be able to edit the HTML of the page you want include it in.
Container
The Sign Up Form container can be anywhere on your web page. By default, we look for an element on the page with the id approveOwl. That id can be changed by sending the containerId in your configuration object to the loadApproveOwl function (details later).
<div id="approveOwl"></div>Embed Script
We require you to load a javascript file somewhere on your page. In the head or right before the closing </body> tag.
You do not want to load this script with the async or defer option as you want the content of your Approve Owl Sign Up Form to start loading as soon as possible.
<script src="https://dealers.approveowl.com/embed.js"></script>Load Function
After the Embed Script, you will want another script block that calls the loadApproveOwl function. This function takes a configuration object that allows some flexibility.
A configuration object is required to be sent as an argument for the load function. We currently support the follow options
consumerPortalrequired (String) - This matches the domain of your Approve Owl consumer portal. We will give you this value.containerIdoptional (String) - The ID of the containing div you added to your layout. Default is "approveOwl".onSubmissionoptional (Function) - Called with the applicant ID after the submission of the contact form. Good for analytics tracking.
<script>
  loadApproveOwl({
    consumerPortal: "vandelayautos.approvehub.com",
    containerId: "approveOwl",
    onSubmission: function (applicantId) {
      console.log(applicantId);
      // You could call google analytics, facebook, or any custom analytics package here to send a custom event.
      // You can also use the `applicantId` to attribute website actions to the analytics user.
    },
  });
</script>
Basic Example
This is the smallest snippet of code that is required to kick off the Sign Up Form in a web page.
<div id="approveOwl"></div>
<script src="https://dealers.approveowl.com/embed.js"></script>
<script>
  loadApproveOwl({ consumerPortal: "vandelayautos.approvehub.com" });
</script>
And that script will generate this Sign Up Form:
Complete Example
It's a good idea to include fallback content in your approveOwl container in case javascript fails for the user due to being explicitly turned off, javascript errors or network / cellular issues.
The loadApproveOwl function will replace any content inside the approveOwl container.
<div id="approveOwl">
  <a href="https://vandelayautos.approvehub.com">Get Approved Here</a>
</div>

<script src="https://dealers.approveowl.com/embed.js"></script>

<script>
  loadApproveOwl({
    consumerPortal: "vandelayautos.approvehub.com",
    notes: "VDP: 2019 Hyundai Sonata Stock #473810",
    onSubmission: function (applicantId) {
      console.log(applicantId);
      // You could call google analytics, facebook, or any custom analytics package here to send a custom event.
      // You can also use the `applicantId` to attribute website actions to the analytics user.
    },
  });
</script>
Wordpress
If you are using the classic Wordpress editor, you will need to switch to Text mode to include the kick off code on your page.

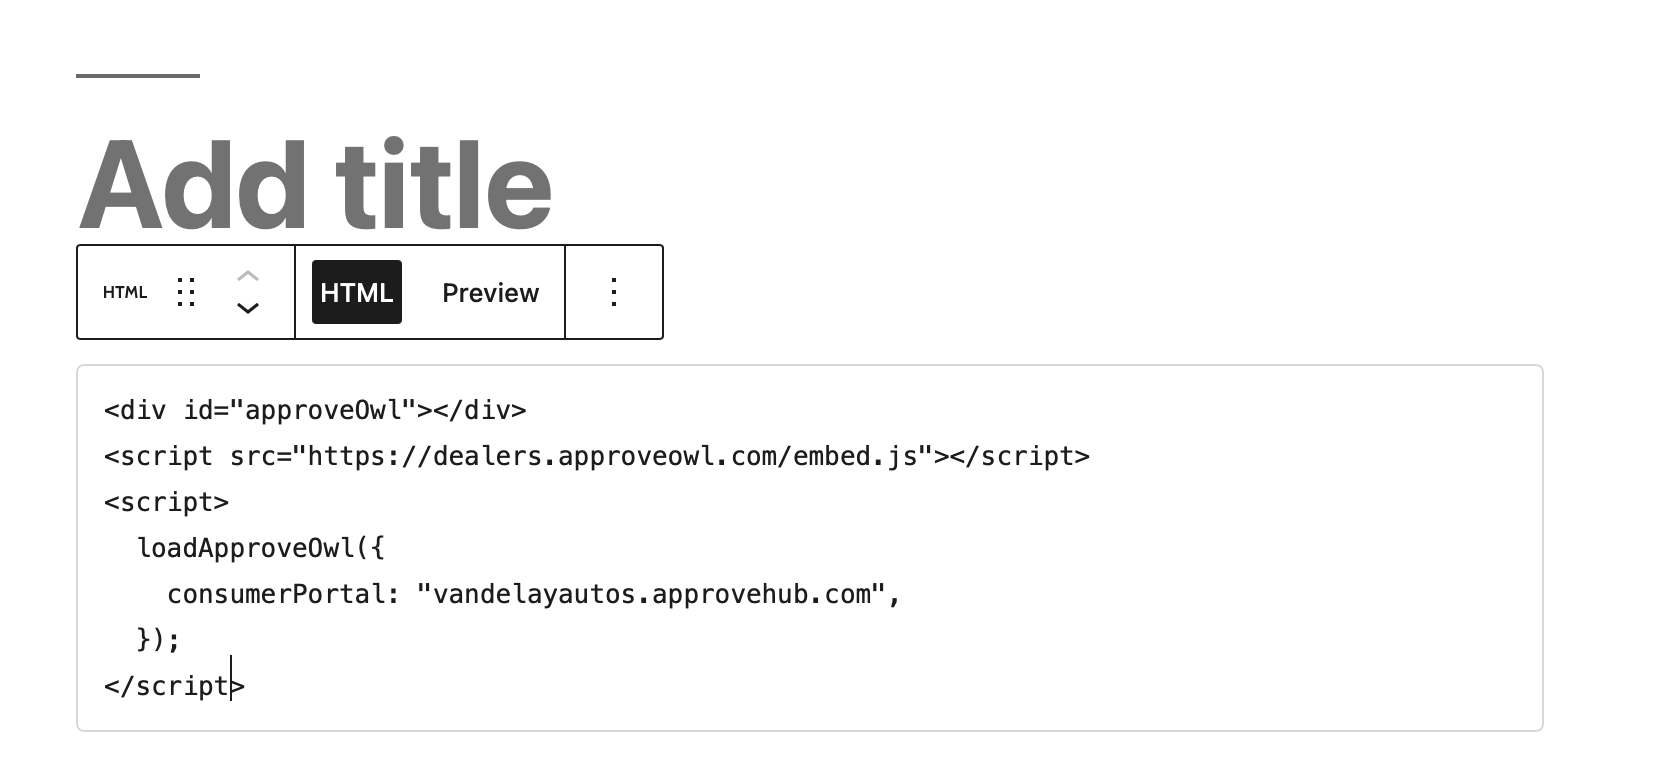
If you are using the modern, block-based Wordpress editor, you can use the HTML block to add the kick off code on your page.
Advanced iframe usage
We do not recommend directly embedding the kick off URL yourself as the URL is subject to change. However, the current path is /sign_up, so your embeddable sign up form URL would look like https://vandelayautos.approvehub.com/sign_up.
If you want to manage the lifecycle of the iframe yourself, you can manually create an iframe element and specify the height and width.
On submission of the form, the iframe will render a "Thank you" message and present a button to the applicant to continue to the verification url to enter the one-time password that was sent to their phone via either SMS or voice (depending on if the phone number was a mobile or landline number).
You will not get an onSubmission callback out of the box. You will need to listen for messages sent from our domain via the window.postMessage() API (opens in a new tab). If you do listen for this event, the data payload will include the following keys:
applicantIdsessionUrlverificationUrl
Directing the applicant to the verificationUrl when you receive the event data will replicate our embed.js functionality.
Recommendations
- Do use the
iframesnippet if you have a statically rendered web page. - Do use fallback content in your container even if it's just a simple link to your Approve Owl consumer portal.
- Do use notes if you want to pass inventory data.
- Do use the
onSubmissioncallback function to attribute anapplicantIdin your analytics software. - Do not manually create an
iframe, even though that is an option. Our embed script allows us to push out changes to the embed form automatically. - Do use the Applicants API if you need more control or want to attribute analytics and referrer data in Approve Owl.